Configure data columns
You can specify the data type and format of the columns in the data table that was created based on the source data.
ARIS Process Mining automatically identifies the source data type from the data in the first few rows of the table, and you typically can accept the preset settings. However, sometimes it is necessary to manually select the correct data type or to configure the format of date or number columns. For example, if the date format of a column places the month before the day (as in 20/13/2013) and the beginning of the file happens to contain only days before the 13th of a month.
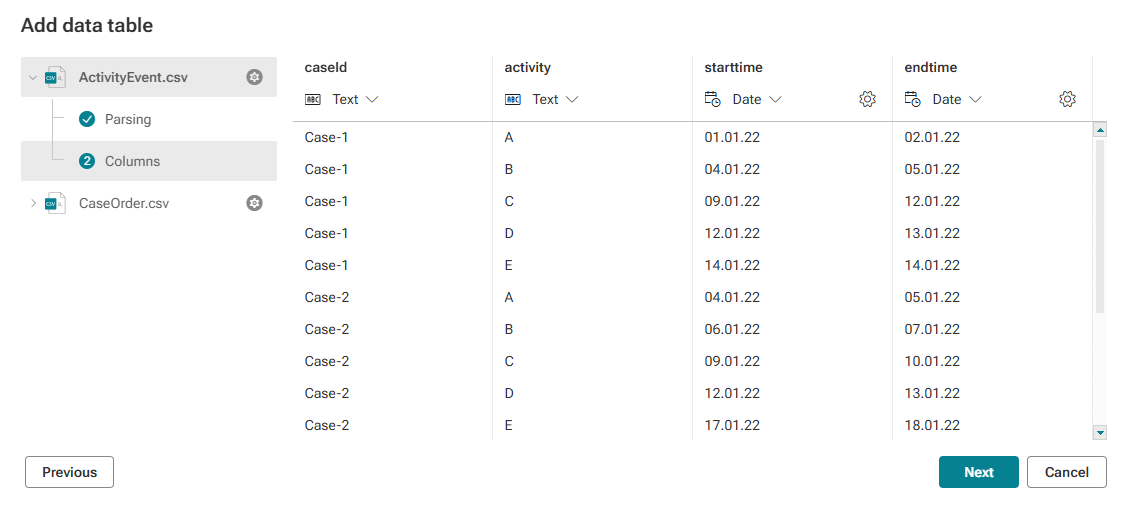
To change the data type of a column, click the data type displayed under the column header, and select another data type.
You can edit the format of the data type Long and Double.
Click the
 Properties icon to edit the data format.
For columns of the data type Long, you can specify the grouping character. For columns of the data type Double, you can specify the grouping character and the decimal separator.
Click Done.
You can change the date formate of the columns of the data type Date.
The parsing of date values is based on the Java parser. For more details, please refer to the Java documentation page.
Click the
Properties icon to change the date format.Select a date format from the drop-down menu.
Enable Apply to all date columns if you want to apply the selected date format of the current column to all columns of the type Date. The option is disabled by default. When you enable the option for one column, it is automatically enabled for all columns. If the selected format is not applicable to a column, an error message is displayed.
Click Done.
You can assign the Text format to all columns or only to number columns.
Click the data type displayed under the column header.
Click More.
Select Use text for all columns to assign the Text format to all source columns.
Select Use text for all number columns to assign the Text format to all source columns of the data type Long and Double.
If you have uploaded multiple files, click Next to configure the parsing and column settings for the next table.
If you configured all tables uploaded, click Add table respecticely Add all tables.
The data columns of the selected data source file are configured.
The example shows the data of the Columns page of the ActivityEvent.csv file. The ActivityEvent.csv file is one of two uploaded files here.