Configure the Input component
The Input component allows you to take an input from a user and to use it as a value for a variable. You can use a drop-down menu, a numeric input field, and a date input field as input elements that you add to the Input component.
Open an app or create an app in the current analysis using the app builder.
Enable
 Edit mode in the analysis header if required.
Click
 Add new component in the analysis header.
Select the Input component in the Add new component panel. The Input component is placed in the app and the Setup options are displayed in the Configuration panel.
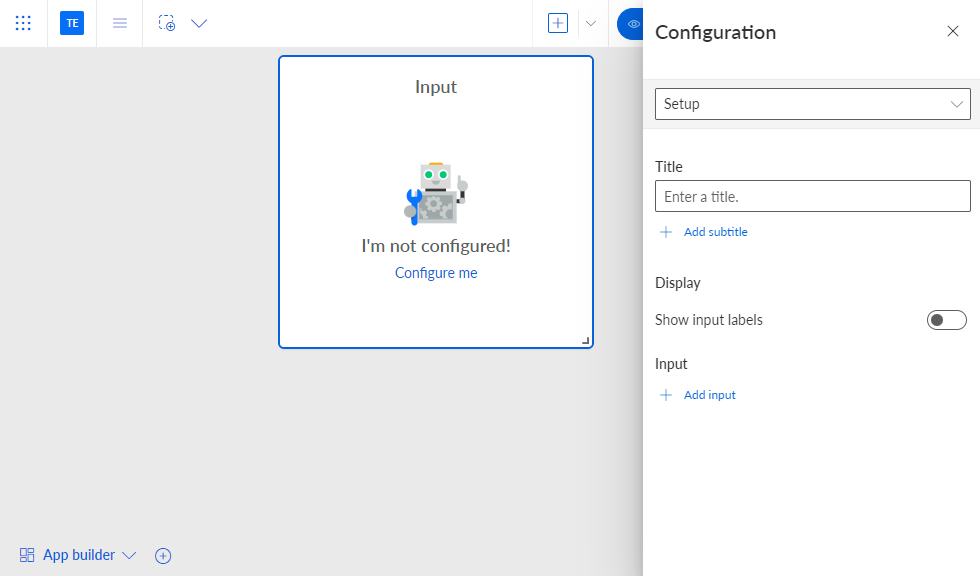
Optionally, you can enter a title and add a subtitle.
If you want to display a label above the input element, enable Show input labels.
Click + Add input and select the element that will be used to provide the values for the variable. You can select a drop-down menu, a numeric input field, or a date input field. The element is placed in the Input component.
Example
The Input component with an added drop-down menu, numeric input field, and date input field.
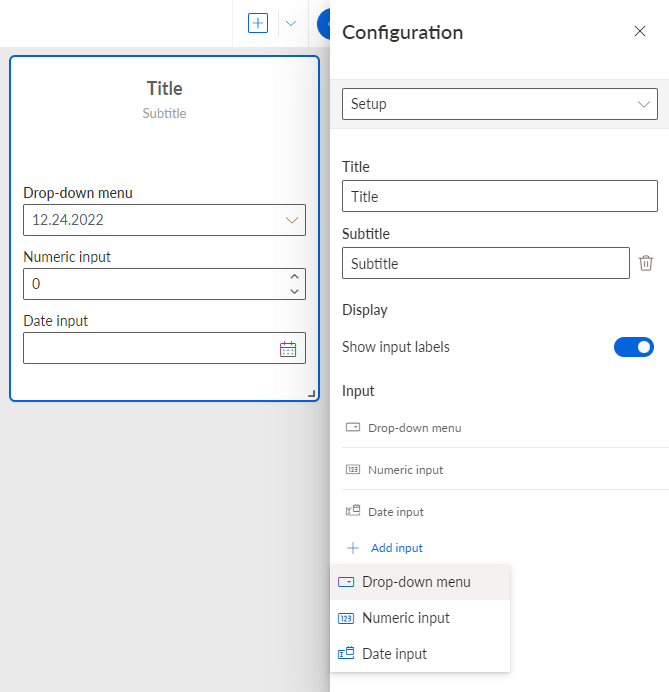
To configure a Drop-down menu as an input element, perform the following steps.
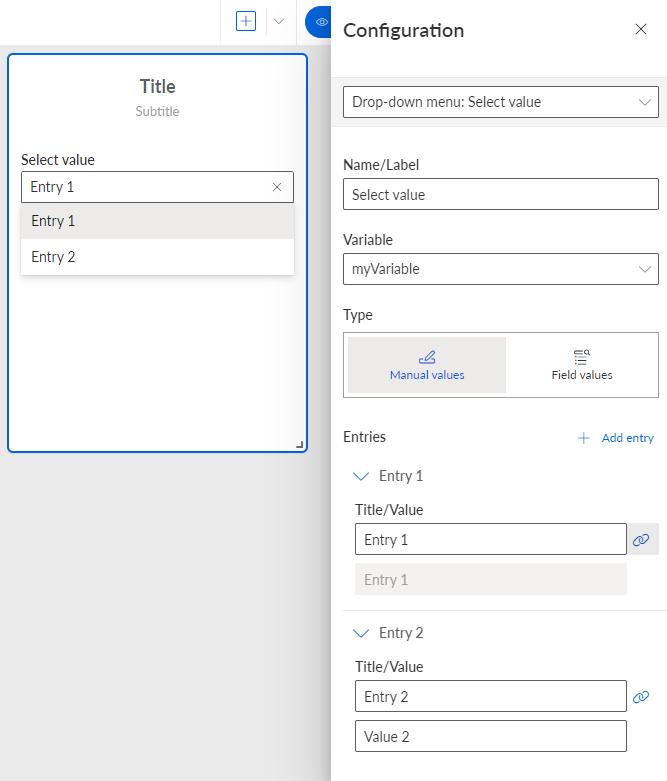
Select Drop-down menu in the drop-down menu at the top of the Configuration panel.
You can enter a name or label that is displayed above the input element, for example, Select value. The Show input labels option must be enabled.
Select the variable for which you want to provide the values in the Variable field.
To manually set the values for the drop-down menu, click Manual values.
Click Add entry to specify the name and value of an entry for the drop-down menu. You can add multiple menu entries.
Enter a title and an optional value for an entry. The title is used as a default value in the drop-down menu. If you want to specify a different value that will be used instead of the title, click the
 Specify a value icon and enter a value.
Example
Drop-down menu with two entries, Entry 1 and Entry 2. Entry 1 has the title Entry 1 as a value. Entry 2 has Value 2 as a different value.
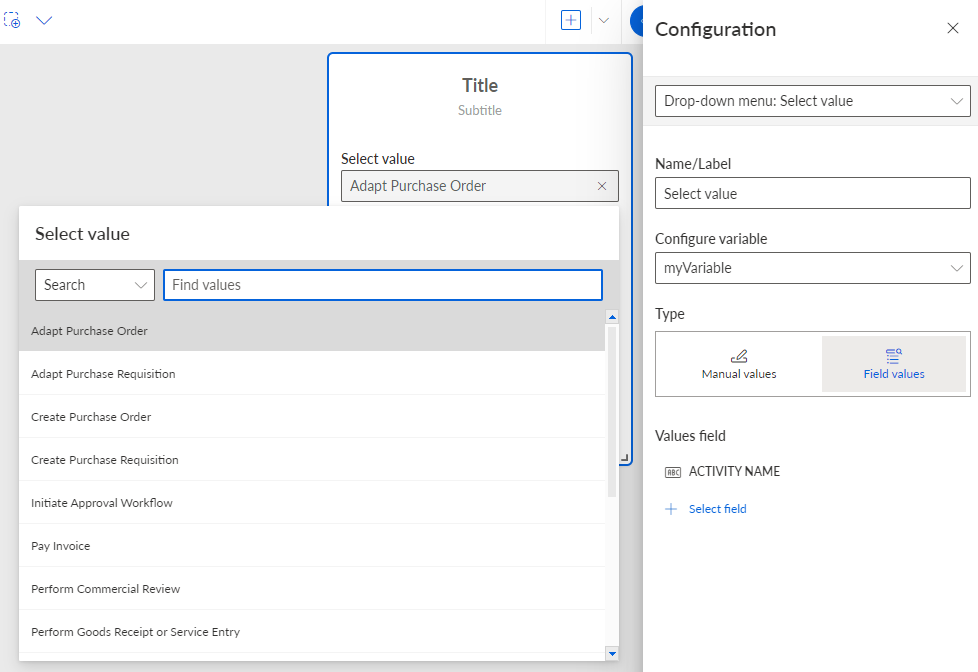
To select a field that contains the values for the drop-down menu, click Field values.
Click + Select field. The Model panel opens.
Select a field, such as Activity name, and click Done.
Example
The values of the selected Activity name field are now provided in the drop-down menu.
To configure a Numeric input element, perform the following steps.
To set a variable value using a numeric input element, you can enter a value manually or use the
 down and
  up arrow keys to step up or down the value.
Select Numeric input in the drop-down menu at the top of the Configuration panel.
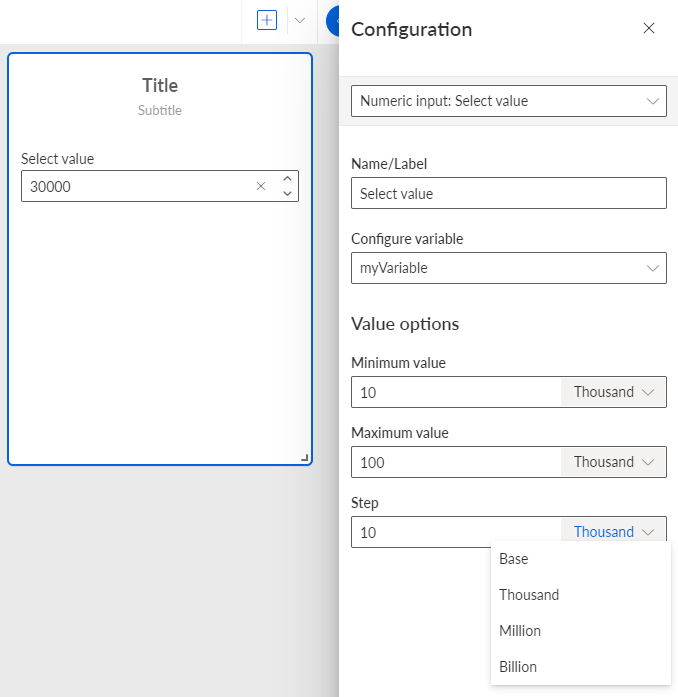
Specify a Minimum value and a Maximum value that can be set as a value for the variable.
You can set an optional step size. By default, the step size is 1.
You can select a multiplier for the values: Thousand, Million, or Billion. If you select Base, no multiplier is used.
Example
To configure a Date input element, perform the following steps.
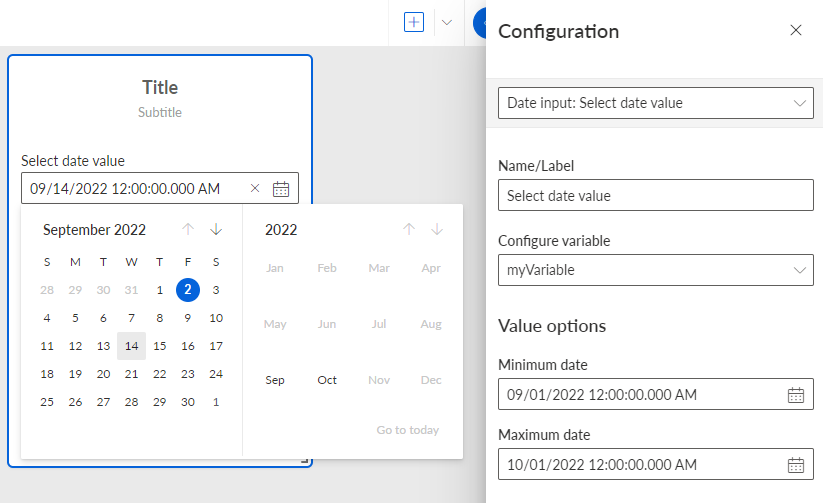
Select Date input in the drop-down menu at the top of the Configuration panel.
Specify a Minimum date and Maximum date, which can be selected in the Date input element as variable values.
Example
You have configured the Input component.
You can now use the Input component to provide values to variables you specified. To do this, add a component to the same app that uses the corresponding variable.
You can insert a variable in a text field or use a calculated field in the analysis that includes a parameter.